Showing posts with label Cool tool. Show all posts

Wednesday, June 21, 2017

Google's Virtual Spinner


Google has added more functionality to their search box. 


Type Spinner into a Google search box and you can use a virtual number spinner (up to 20 numbers).


Or to keep up with the latest craze, switch to a fidget spinner.


On both spinners, the user can either click the SPIN button (multiple clicks gives a faster spin) or click and drag across the spinner (faster drag equals faster spin).


Just another way Google is trying to help virtualize tools for the classroom. What other tools you may ask? Check some of these out.

Basic math calculations - just type in your math problem to see the answer; like a calculator. For that matter type calculator in the search box to use an actual calculator.

Unit Conversions - type in feet in 37 yards, or cups in 20 gallons, or any unit measure dealing with temperature, length, mass, speed, volume, area, or time.

Hex values for Colors - type Color Picker in the search bar, select your color, and get the Hex number values for that perfect color for your project.

Timer - type 5 minutes timer (or whatever value you need) to get that length of time

Tip Calculator - type What is the tip for $50 (or the value of your meal), then set the percent and number of people splitting the check.

Coin Flip - type flip a coin into the search box to flip a coin

Animal Sounds - type What sound does a dog make? It will give you a sound file to listen to. Try it with any animal.

Definitions - type define and your word to get the spelling and definition of the vocabulary word.

Time in another country - type time:Sydney (or your country or state you want to check) to see the current time in that location.

Play Pacman - type Pacman into the search bar to play the Pacman doodle.

Play Breakout - type Atari Breakout into the search bar and select the images tab. Now you can play Breakout of the images Google returned.


Friday, March 10, 2017

360° Videos


I am a big fan of the whole 360° video sensation sweeping across education at the moment. I like the Google Cardboard/VR Headset idea, but we don't have very many of these in our district. What we do have are big SMARTBoards, 70 Inch Monitors, iPads, and Chromebooks. So we can still utilize the videos, but just not as immersively as the Cardboard experience. 

YouTube has lots of 360° videos posted. However, just a search for 360° video can bring up some inappropriate videos as well. So don't just turn students loose. The teacher should be the one to search. 

I really like the National Geographic videos. Here is a link to their playlist

Don't forget about the Google Arts and Culture website. Many Street View and some 360° views can be found in it as well. 

Some people are afraid to use YouTube with students do to the recommended videos and comments section. So here are a few tips to get around that.

1. Use a tool like https://safeshare.tv/. Enter your YouTube video URL into the box and Generate a Safe View


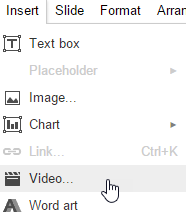
2.  Use the Insert Video option in Google Slides. Then in Present mode, the 360 Video will still work. 


A Few of my favorite 360° examples


Monday, January 30, 2017

Google Arts & Culture


I attended several 30-minute webinars from Simple K-12 over the weekend. Simple K12 is usually membership based one demand lesson plans and webinars and more, but they do offer free webinars as well that anyone can sign up for.

One of the sessions I attended was “Virtual Explorations and Field Trips with Google Tools” with Jerry Swiatek. @jswiatek

He talked about Google Maps and Google Earth, but he could have spent way more than his 30 minutes on just the Google Arts and Culture site. What an amazing resource.

Art classes can zoom in to famous paintings to see brush strokes.
Make sure to check out the projects section for curated media over various topics.

Look up Historical events and figures.

Look at all of the Partner websites associated with this cultural institute site.

See content curated by place.


So much to explore on this site. I strongly urge you to take a look. 

Friday, January 20, 2017

Microsoft Photo Apps


My district has been moving more into the Google world so a lot of my posts and tweets are about Google. Today, I want to share some of my favorite Microsoft camera apps.

Office Lens - (iOS | Android)
Office Lens trims, enhances and makes pictures of whiteboards and documents readable. Have you ever been in a meeting or at a conference and someone has a lot of information either on a whiteboard or projected onto a screen. In my case, it is hard to write everything down quickly enough. I've tried taking a picture with my phone, but usually, there is a glare or I am standing at some angle that just makes the picture hard to read. That is where Office Lens comes into play. Office Lens will take the photo, crop, enhance, and straighten the picture and allow you to save in a variety of formats.


Microsoft Pix - (iOS)
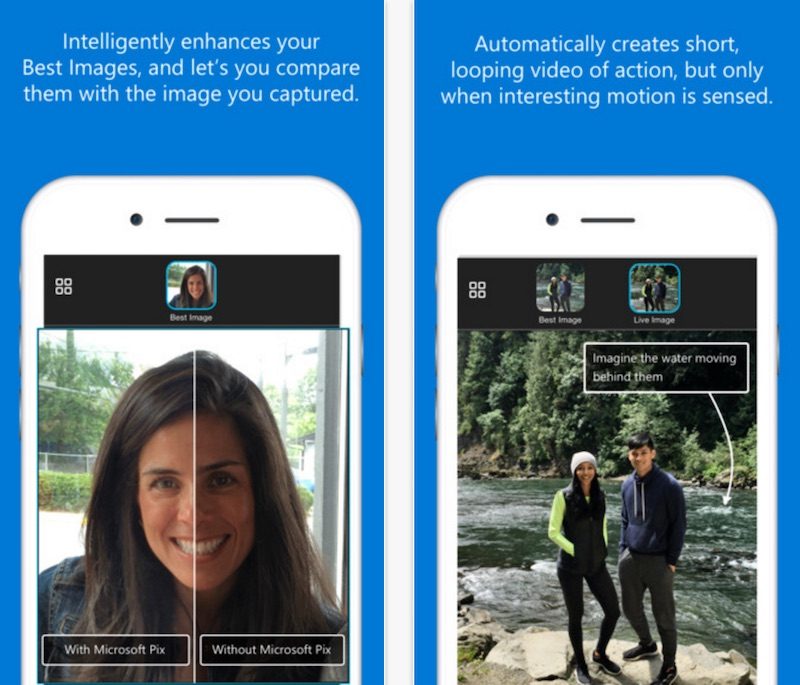
Pix is one of the easiest camera apps for the iPhone and iPad. Just snap the picture, compare the images to select the best photo to edit, and save and share to the apps already on your phone. Pix has face recognition, selects the best image out of a photo burst and works with live photos as well.


Microsoft Selfie - (iOS)
Microsoft Selfie is a selfie and photo enhancement application available on iOS, web and WeChat. A simple tool for creating seflies. The app comes with Intelligent enhancement, noise reduction, and auto exposure editing features.


So if you are looking for ways to use your camera, give these three apps a try. I believe they are worth a look.

Friday, July 29, 2016

TCEA Chromebook Academy


I have the opportunity to present today at the TCEA Chromebook Academy. I've been asked to present my Give your Classroom a Voice with Blogger session. A really fun and easy to use tool to give your classroom a voice.

Check out my resources: http://scottfirenza.blogspot.com/p/blogger.html 

If you are at the academy come by the Transformation room at 2:00 PM.

Friday, February 19, 2016

TCEA 16 - Adobe

Ok, I realize I haven't been on in a while. Insert work thing, personal thing, life thing excuse here. 


So starting today, I wanted to start a series of posts from the learning I picked up at TCEA 16 this year. TCEA (Texas Computer Education Association) is a member-based organization supporting the use of technology in education. Their annual convention is usually around the first of February. If you have any interest in educational technology I highly recommend going to this conference. Here is the link to next year's convention. http://www.tceaconvention.org/2017/


So, 1st in the post a bit about the Adobe apps I learned more about. I had heard of and tinkered with many of these, but some were new. Here is a quick run down.

Adobe Clip -  easy video editor from your pictures and videos; can add sound from stock soundtracks or your own music

Adobe Capture - take a picture and capture the color theme of the moment to use in other projects

Adobe Draw - draw vector illustrations

Adobe Post - add text to your photos for easy to create social graphics

Adobe Slate - create parallax scrolling websites easily with this app; great for website, electronic newsletters, and invitations; easy to create and share

Adobe Voice - create animated videos from your pictures or stock icons, talk to record your story, and share with the world.

Out of all of these, I probably like Voice the best with Slate and Post coming in close 2nd/3rd. I am still big on digital storytelling as a means for students to create in the classroom. Voice is the project for that. Slate is easy to use and I can see it as a way schools could send out information and students could create presentations. Post is just a fun way to add text to my photographs before I post on social media. Plus, saving to the camera roll on most of these apps is a big plus in my book. I can decide what to do with the project instead of it just sitting on Adobe's server.

The drawback... you do have to have an Adobe ID login. You can use a Facebook account, but that may not help most students. The two presenters I went to handled this in three different ways. 

  1. Have each student create their own account. Not particularly handy if they are under 13.
  2. The teacher created an account using their email address and logged in to the classroom iPads with one account. The problem there is the lack of security as each project from the iPads shows up on every iPad. 
  3. Teacher's created an id based off of their account. If you have a Gmail account you can add a plus sign and number in your email address, create the adobe account, and all email correspondence goes back to the original email address. For example, myaccount@gmail.com is my original email address. For my Adobe ID, I could create myaccount+1@gmail.com, myaccount+2@gmail.com...and so on and use those IDs on each individual iPad. If you want to know more about this watch this video (they use text after the plus sign, but you can use numbers if you want).


The other drawback... The images didn't seem to be filtered. Or at least some images got through that I would have though our district filter would have blocked. So you might use the apps with a word of caution. Perhaps using them personally before turning student's loose with them so you know what to expect.

So go ahead and try these Adobe iOS apps. I think you will like them. 

Friday, January 15, 2016

Tinypng


tinypng is a utility that will shrink the file size of your png and jpg files.

From their website:

How does it work?
Excellent question! When you upload a PNG (Portable Network Graphics) file, similar colors in your image are combined. This technique is called “quantization”. By reducing the number of colors, 24-bit PNG files can be converted to much smaller 8-bit indexed color images. All unnecessary metadata is stripped too. The result: better PNG files with 100% support for transparency. Have your cake and eat it too!

I tried it with a few png files I had and it does what it says it will do. I didn't notice too much difference in the images and especially in clip art type graphics no difference. 


Give it a try.

Monday, January 11, 2016

ocenaudio Audio Editor

logo

For a number of years my go to audio editor has been Audacity. And I feel I have tried many others, but always come back to Audacity because of its simplicity to edit and export.

I recently came across an newer player in the game, ocenaudio. ocenaudio is a "cross-platform, easy to use, fast and functional audio editor. It is the ideal software for people who need to edit and analyze audio files without complications. ocenaudio also has powerful features that will please more advanced users."

Looks like it works on Windows, Mac, and Linux only. It installed very easily with the .exe file and opened very quickly. The controls are intuitive with the red record button, familiar play, forward, reverse, and stop icons. There is also an easy way to drag and drop audio files, folders, URLs... instead of having to import or open.
From the file menu, users can save the file as a variety of format, export a variety of formats, and even create an iPhone ringtone.


So if you are looking for an easy to use audio recorder/editor give this one a try.
http://www.ocenaudio.com.br/whatis

Video Tutorial on ocenaudio

P.S. HAPPY NEW YEAR! Hope everyone is having a great start to the year.

Wednesday, December 16, 2015

Appy Hour... Christmas Edition


I haven't written about our Appy Hour presentations lately, but here is the last one we did. We highlighted 5 iOS apps to get you through the holidays.

Google Keep - iTunes 
Google Keep is a great and simple note taking app. Teachers and students can login to https://keep.google.com to take notes from any browser or use the app. Any note will sync to any device with the Keep app or that can be viewed from a web browser. Keep has the ability to take notes, set reminders, create to do lists, snap photo to add to a note, and share notes with others. If you are looking for a simple way to keep up with Christmas to do lists, or shopping lists, Keep can help keep you organized

Norad Santa Tracker - iTunes 
On Christmas Eve, use this app to track Santa's location.

Christmas Countdown - iTunes
Instead of kids asking every 5 minutes, "When is Christmas? When is Santa coming?", install this fun little countdown app to let them check. 

Tiny Calm - iTunes
So the kids are driving you nuts, your Christmas cookies are crumbling, the cat knocked over the tree again, and you just found out your in-laws are staying an extra 3 days. You might need to enhance your calm. Use this simple meditation app to do just that. 

Nutshell - iTunes
Nutshell is an app that tells you to snap three photo and capture a moment. As you snap the photos, you are really taking video. The videos just stops and focuses on each photo you took. So you are capturing the moment in a nutshell. Add text and small animated icons to your photos for more excitement. Then save the video to your camera roll and upload to your favorite social media to share your nutshell moment.  

Friday, November 20, 2015

Try Spruce for Social Media Pictures


Spruce is a great way to add text to a photograph to use in presentations or for your Twitter feed. Visit http://www.tryspruce.com/ to start the process. There is a how it works button, but it really is pretty intuitive.


1. Insert your Text.
2. Pick your Font from the pull down menu
3. Search for a background photo or upload your own photo
4. Download your image or share it through Facebook or Twitter

Now you should have an attractive looking graphic for your presentation or social media needs. Give it a try!

Monday, October 19, 2015

Ribbet


In 2005, a tremendous photo editor, Picnik, came out and helped transform free, online photo editing. This site was a great tool for teachers and students alike as the ability to edit photos from any web enabled computer was now available, free. Then around 2012, Google purchased Picnik with the hopes of bringing the photo editing experience to their products. However, this unfortunately meant the closure of Picnik. There was much sadness and disappointment in the education world, myself included, as this tool was perfect for photo editing.

We tried to fill the void with other good online tools like PicMonkey and Pixlr, but there always seemed to be that hole that something wasn't quite right.

Today, as I was looking at some other Chrome tools in the Web store, one of the "suggested for you" links was Ribbet. And I noticed a curious little tree frog looking back at me. So I went to the link and discovered Ribbet is Picnik! Well, not the same company, but basically the same product taken on by a team of programmers and designers who saw the public outcry for Picnik. They even got permission to use the tree frog image.

I don't know how long this has been out there, but I am pretty excited about using Ribbet. Great for online photo editing and collage creation. Just like Picnik, the majority of the site is free, but there are some Premium edits only available to those that upgrade and pay the $29.95/year fee (that is the best price; there is also a $4.95 monthly, and $19.95 six monthly).

So visit www.ribbet.com and get to creating!

Thursday, September 24, 2015

360 Degree Video

Recently, YouTube started posting 360 degree video on their service. What that means is you can click and drag across the video and see all views the camera took while the video is playing. Photographs have been allowing that for years (think Google Street View), but now with the advent of 360 degree video cameras (like the Ricoh Theta) video can be taken as well. Try out the video below.


Click and drag across the video to see other angles under the sea.

Where this really shines is on a tablet. Now instead of clicking and dragging, the user can just move the tablet while the video is playing and the video follows the movement. So I hold my iPad, view the video, and turn 90 degrees to the right the video will follow my movements in the same direction to the new point I am turned to. Way too cool!

The cameras are not cheap, but we all know as the technology develops the prices tend to drop. Not every 360 degree video is appropriate so don't just turn students loose searching for video. But what a way to take students to a virtual field trip. Now we see more than just the pictures, or the straight on shot the video taker is looking at. 


Thursday, August 13, 2015

Allow anyone to upload files to your Google Drive


The Google Gooru has offered a great tip that really could fulfill an need some people may have. There are times someone will need to send me a file and it is too large to email, my Dropbox is full, and I wish they could just send it to my Google Drive account. Follow the video's steps and now they can. A script has been created that allows anyone to upload any file directly to your account.

Go to the website http://www.tinyurl.com/googledropboxscript to get the script document, make a copy of it, deploy it as a web app. You will then get a URL to share with people so they can upload documents directly to your Drive account. The URL is pretty long so I would use a URL shortener like tinyurl, bit.ly, or goo.gl to send people a shorter link.

The video talks about setting the permisisons so anyone with the link can share to your Drive, but if you are a GAfE district you may be limited to just your district's domain.

Very easy to setup. Give it a try


https://youtu.be/_E3_1qMqXlE


Monday, August 10, 2015

.qr


OK, I'm not usually this easily impressed. This is new to me and a few others Googley people in our district I have shown it to so I think it is fairly new.

When you use the Google URL shortner and receive a goo.gl url (for example, http://goo.gl/9U70MF) you can type a .qr at the end of that URL and press enter to display a 150x150 QR code for that site.

To create your Google shortned URL go to https://goo.gl/, type in or paste in your long URL and press the shorten URL blue button.Now copy and paste that shortened URL into your omnibox and type in the .qr after it and press the enter button.

So http://goo.gl/9U70MF.qr will get you this.
You can save the QR code as an image to paste into other documents or just leave the web page up for people to scan. It is only a 150x150 pixel size, but it looks like you can edit the URL to make it larger. 

http://chart.googleapis.com/chart?cht=qr&chs=300x300&choe=UTF-8&chld=H&chl=https://goo.gl/9U70MF  gives you